URL rewrite issues with ASP.NET Razor 3
 I recently upgraded MiniBlog from using WebPages/Razor 2 to version 3. The upgrade was completely painless. I just upgraded the NuGet package and it didn't even touch my web.config. Thumbs up to the Razor team for that!
Everything seemed to work fine, but then I noticed that my root-relative links such as <a href="~/category/web-essentials"> didn't work correctly anymore. The ~/ no longer pointed to the root of my web application, but instead to the first path segment of my URL. So, when the browser was at /post/my-post, then the ~/ in my link would resolve to <a href="/post/category/web-essentials">. This was wrong.
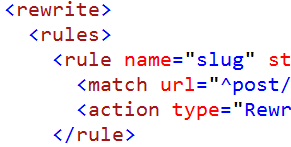
The reason is that I use URL rewrites in my web.config to map /post/whatever to /index.cshtml?slug=whatever and that was the reason for this strange behavior. Here's my rewrite rule:
<rule name="slug" stopProcessing="true">
<match url="^post/(.*)" ignoreCase="true"/>
<action type="Rewrite" url="/index.cshtml?slug={R:1}"/>
< /rule>
So in order to use WebPages/Razor 3 with URL rewrites like mine, I had to tell Razor to ignore the <rewrite> segment in my web.config. That's easily done in global.asax like so:
public void Application_BeginRequest(object sender, EventArgs e)
{
Context.Items["IIS_WasUrlRewritten"] = "false";
}
Now Razor correctly maps to the root of the website when using ~/.
Not all cases
This little workaround is only needed if your URL rewrites happen in the path of the URL, but not if you use sub-domain rewrites. For instance, if you use URL rewrites to map sub.domain.com into domain.com/sub then it all works fine and you don't need this workaround.

